Sunday, June 29, 2014

This post has everything...


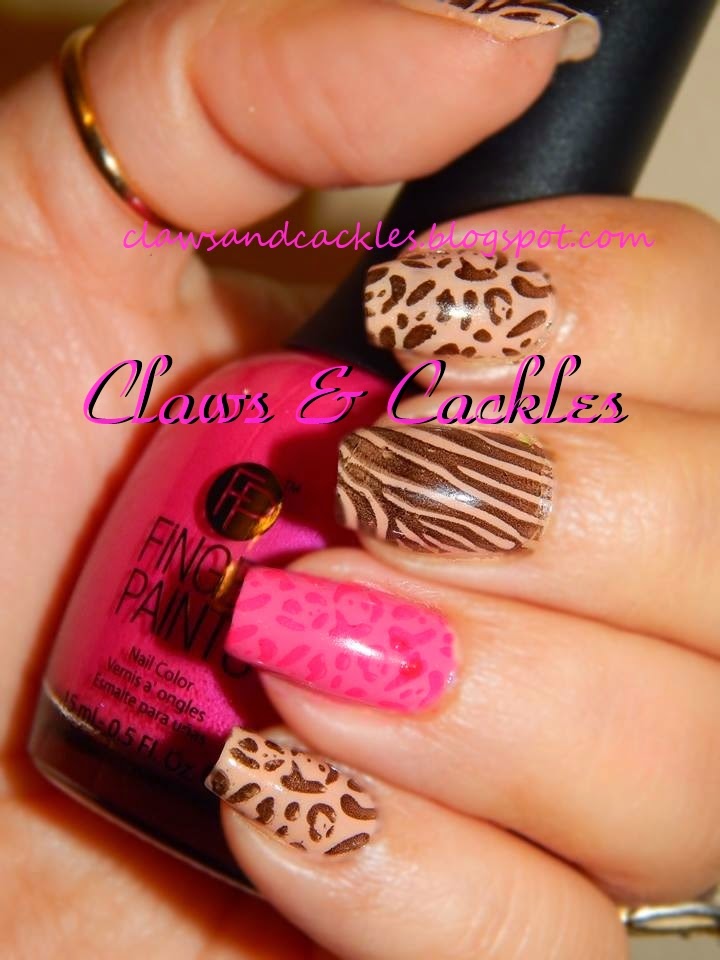
Ok so today's mani had me cracking up, and I could just hear Stephan saying "this mani has everything, water-marble, stamping, glitter, confetti and more glitter..."  But wait I'll get to that momentarily.

Since the last post I did 3 different designs so I need to go back and share those too... SO the first one was kind of interesting... let me tell you why... I have been reading about jellies and I've seen a few over black (at least as I understand it?), so that was kind of my intent to add that into this design, then I decided to alternate with pink having already used finger paints "pride" along with Revlon's "Celestial Fix" over "Black Magic" , of course I couldn't decide on a pink so had to redo the alternate fingers 4 times while I tried to settle on a specific shade, I finally settled on Essie "Jamaica me crazy" which matched pretty well to the Pride glitter... So then because I sometimes just keep adding and adding, I decided to stamp with my Konad special polish a design on the pink (magenta?) , anyway, I did really like the overall effect. The problem I had was that after a few hours the top coat seemed to sink into the glitter or something and it started to seem more gaudy than it had at first... this reminded me of a prom dress that you just LOVE and think is so glamorous and fancy at 16 only to look back ten years later and think "omg that was awful and gaudy!!"  so these got named "Gaudy Prom Dress Nails" ;)

I just can't stop adding a layer of china glaze "fairy dust" to everything! 

So those didn't last too long because the love was gone... :)  I have really been wanting to use my Orly "glowstick" but it seems every time I try I end up disliking the result and killing the design. So I thought I would try it with a turquoise and see how it worked out.. I thought they were cute... and BRIGHT :) the stamp was a rounded chevron on one of my Cheeky plates, (which I just don't have handy and no way my memory is good enough to remember something like that from a few days ago ;) ) I ended up using Milani "Aqua Brisk" and SC "Why Not"  for the stamping, the why not was darker but I didn't want to have to start that whole layer again so I just alternate the darker and lighter... The first go round I added a small heart with wings to the accent nail, but after about 10 minutes I didn't like it so I went over it and added SC "call you later" a green glitter. However the best picture was of the heart stamp design so that's what you get to see! (lucky~~ ;) )

So that brings us to today's design... it was one of my more frustrating attempts tonight. I just couldn't decide on a color, maybe that's because I'd been polish shopping and came home with a few new colors to add to my already overwhelming choices.  I could list all the ones I put on and took off but that might take all night... sufficed to say that by the time I decided to scrap the stamp design I had done several of and finally try water marble I was a wee bit frustrated. Probably in retrospect starting on something you've never attempted when you are already frustrated and indecisive may not have been the best move.... anyway moving on, I tried probably about 6 different color combinations in the marbling having varying degrees of success. Finally I decided just to do a swirl and dunk 3 fingers in simultaneously, and also decided to go ahead and use red white and blue, a bit early for the 4th since I'll likely destroy this design by Tuesday if it lasts that long... I'd like to say it went smoothly from there, but that's not really accurate... ;)  I did however settle on the designs I felt I could handle for a little while at least. then I had one random accent nail, and I decided to stamp blue stars using my Cheeky CH4 plate, but that wasn't enough so I added a coat of Revlon "Graffiti" and a coat of SH "beach ball".  By the time I got around to taking pictures, I've found that I don't dislike them as much as I initially thought... So maybe they'll live a day... :) 


Tuesday, June 24, 2014

OK well....

These nails are not my favorite... I like somewhat of the effect so I'll still post but with several caveats, this is the 2nd day with these and yesterday I was in paint & craft overdrive... so that they made it intact is fairly impressive... these were done with Cheeky Jumbo plate N , I was in a hurry so just grabbed the first plate my hand landed on so that I could get them done quickly... also wanted to try out my new SH Grease Lightning dark gray, so I paired it with CG Pelican Gray and SH Insta-Dri Silver Sweep and my almost always present CG fairy dust. Anyway it's usually the day I do new mani, so I should have something new soon... :)

bit of a gray mess :)

Saturday, June 21, 2014

Whoooo wants more nails?

Owls that's who!  So the other day I was doing my friends daughter's nails for their vacation to the city... Alas I didn't take pictures :( but she was happy with them so I was happy (navy blue with silver chevrons, and one with a city outline) But while showing her my stamps I came across this cute little owl on the Head of the class cheeky jumbo and we both agreed he was pretty cute. So after the first iteration of the owls done with SH "Pronto purple" stamps over Maybelline "Chiffon chic", just went too far into not working land... I switched the whole thing up and decal'ed them using konad special black over a finger paints "where art my love" base and filled in with the "Chiffon chic" on the owl pattern and a few insta dri's for added individual owl color... I was pretty happy with these even with a few smear and painting outside the line issues... :) the owls just made me smile :)


Tuesday, June 17, 2014

It's summer... it's hot... it burrrrrrns....

Ok well it doesn't ignite really, it's just an icky hot humid mess that we lovingly know as summer in Texas... I've been here long enough, I should really be used to it... but for this nail "do" I decided to pay homage to the heat... I actually really was feeling orange and then started with an orange yellow red ombre sort of look, but it just wasn't working, so I looked at my newest Cheeky full plate and it had a fire tip... the young dude (my boy) suggested black, but when I tried it, it looked like Frankenstein hair... not what I was going for. not.at.all.  So I started over with 2 base coats of Sally Hanson Insta-Dry in "Lightening"  a fingerpaints orange (that I have the bottle packed away to do a friends nails tomorrow - I'll update the name when I open the box back up) all sponged and then stamped with Wet and Wild Megalast in "Red a good book"  - after stamping I went back and added highlights with Covergirl outlast glosstini "rogue red" and "Flamed out" was happy enough that these have been on since Sunday and since I didn't redo them today will be on till Thursday at this point... And yet alas not one really decent picture...

my kingdom for a decent picture...
I took quite a few in different lighting,
but just never got it right this time...

Some more recent history...PT II

Ok so it took a few days but back again to get some of the history pictures up so I can start with new fresh postings... YAY~ ;)  Of course I've done 2 new designs which are quickly becoming history... arrrgggh... but I digress...  Ok let me see where we were...

ah yes... nails...

these were a super fast -
I just can't make a decision just
have to put something ON~ kind of nail
Ok so just looking at my fingers, you can probably tell I'm not much of an outdoor enthusiast... and well I live in Texas and it's HOT and HUMID, there is a reason we have A/C everywhere!! BUT if there is one thing I LOVE more than being not hot, or dirty, or bit by bugs... it's my boy... So this fru fru mama went camping! BUT if I had to camp I was darn well gonna do it in style... :) I did have some smearing issues when I did my top coat on the pointer finger... but hey it's supposed to look organic right?

camouflage 

I mentioned in one of the photos in the pt 1 recent history that I bought a new black stamping polish, I am still having issues with it and the smear factor, perhaps I'm just not waiting long enough? I'll continue to investigate... with the below I had trouble with the new "gelous nail gel" by ACI - I put it in between final stamp and SV and in many cases it seems to help lessen shrinking and keeps me a bit more chip free, however, it does tend to smear the stamps... boo

smeared a bit... :( -  "love letter"
I really want to get better at photographing these things, it really does bum me out when I can't get an accurate photo after all the work that goes into these things... but I'll keep trying! :)

shadowy picture :( but I did love
these colors!!
And I actually think that brings us to the present! YAY!! So excited!! See ya then! 

Saturday, June 14, 2014

Some more recent history...


Ok so now I can add some of the more recent ones that I've started doing, again still pretty new at this... I've learned a lot from YouTube, Pinterest, and lots of blog stalking... :) again the photography needs work, I think I need to get or make a light box, and keep the batteries update on my bigger camera, some of the ones with my iPhone tend not to be color true.

After discovering stamping I picked a set (CiCi & SiSi set 1) on amazon, it was around 30ish dollars and seemed to have a decent selection of designs...  The first outing with them was a bit of trial and error, I had watched several videos so I felt like I had a good idea of what to do, however the images just were not sticking to the rubber stamper, I did some more searching and found that you sometimes have to prime them by filing lightly and then removing any debris with tape. After learning that by the way I've never used acetone on my stampers preferring to use lint rollers to clean. I was able to finally get the hang of it...


the first stamps...
couldn't decide so did a few :)

settled on a completely different
design!

These I called my peacock nails...
The one thing that I have noticed that most of my polish does tend to chip after a few days, but so far that's not been a problem because I get antsy to change them after that anyway. I was having some trouble too with the polish peeling off in sheets... I think I've found closer to the correct ratio for top coat etc. also added some new base coat options to my collection... I started out with about 20 bottles of polish... today I have about 120 and that seems to be growing quickly... Also my plate collection has grown at the same rate, I have plates from Cheeky, Bundle Monster, Pueen, Mash and the aforementioned CiCi & SiSi. The only ones I've noted trouble from are the Bundle Monster having had some designs not lift from the plate.

edges still a bit messy
- but this was a fun one


Had a little trouble with the black polish
stamping on this one on all fingers...
Again I feel I should mention that I really am getting better at cleanup!! Really! My Mom, who was a nail art magazine published nail tech a while back, suggested I get pure acetone which totally helped when removing glitter polish and many layers...  She also just lately gave me her refill bottle of Seche Vite... Awesome!!

like if a watermelon and a cheetah
had a baby nails... lol (let's all ignore the
lack of clear coat cleanup shall we?)

This one was one of my faves,
unfortunately it self destructed
after a day :( plus the black didn't stamp
well... definitely need to do this one again

These were my first stamp decals,
the chevrons could have been
cleaner, but I loved them bunches!
again will have to retry for a better result.


Sometimes, like this guy a full
design never sees the light of day
for some reason I just wasn't feeling it
so I started over...

It does happen, like the example above, that I completely finish my nails and they just aren't what I want, I have and will at that point break out the polish remover and do them again... That is one of the big reasons behind this blog, if I took their picture and posted it, well they weren't wasted! :)


feeling summery!

"the memorial CLAW" :)
great lighting in my Mom's kitchen!!
bought a new black stamping polish!

Well I thought I'd get all the older ones in one post and be able to just get up the current ones, but I'm out of gas for this round... So stay tuned for part II! Also When I get current I'll be better about listing the colors and stamps used... Since these were saved on my phone and were mostly to send to the few people I had been pestering with them... :) 


History...

Here are some of the previous nail stuff I had done before becoming obsessed :)
deffinitely needed better cleanup... this was the Sally Hanson Salon Express that I cut to make tips, not too much longer after I found they were making such a thing pre-cut


Again, more Sally Hanson Salon Express - these were near the beginning of trying them, sorry the pic isn't great... really I'll improve!! :)

Again a different SHSE these were at Christmas and I picked them for the fun holiday aspect... It's zebra Santa Y'all!~


yes shockingly SHSE again :) I think I did get better at applying them as I did them more often - I tried other brands, Essie, KISS, etc. but none of them worked as well as the Sally Hanson in my opinion... (I never tried Jamberry though which has way more designs, just the heating to apply didn't sound like something I'd enjoy... )
Finally we get to one of my first forays into painting and freehand decoration... this is really what led me to Pinterest for ideas... 


I'll have more to add, but need to hunt down all the older photos... stay tuned!

In the beginning...

So OK this is something I've wanted to do for a while... I had the obligatory generic website in the early 90's and a wedding site when I married the Mr in 2003, but ever since the blog world took over I just never really felt I had much to contribute... even though I'm a crafty type, it just wasn't regular (wait... I mean I wasn't consistent... that's a better word ;) ) but then slowly a new addiction took over my life... it started slowly and innocently (don't most?) . It all stemmed from the very basic decision to stop wearing the acrylic claws I had for so many years (well after a few year hiatus of not wanting to stab my then itty bitty with them)... I could save SOOOO much money (she says with a bit of foreshadowing sarcasm). For a little while it was ok, I wore my nails short and did lots of painting, but then I found Sally Hanson Salon Effects stick on nail polish... they were awesome! So many fun designs, and oddly my generally brittle weak nails grew stronger... I'd occasionally switch to regular polish... but for the most part had stick on fun!! Till I got bored of the fact that there were only a dozen designs to choose from... So I started painting them different designs... and looking on pinterest for ideas. So it was that I found nail stamping, and the last month or so has been so much fun!  Please excuse the pictures as I begin I'm trying to find ways to improve on the photography and layout! But anyway hope you enjoy and hopefully I'll get better at all of this! :) and oh btw yes these are my natural nails and there are some that seem a bit more curved than others? weird... But I'm pretty happy with how strong they seem to be lately.